This is the triangle of exposure. Exposure is made up of three separate settings on the camera iso, shutter speed and aperture. For activity 5, 6 and 7 we had to experiment with these 3 setting on the camera.
The first activity was to test what kind of shots you get when you use all of the different iso settings.
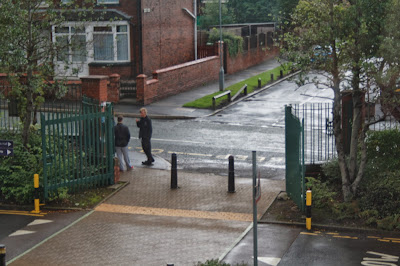
The first photo taken was at 100 iso and you can tell that the picture is a bit darker than it actually was outside.
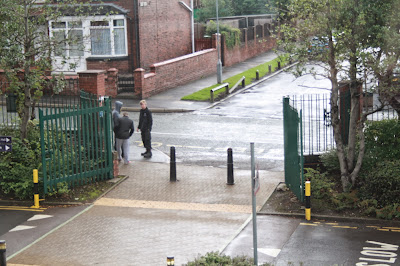
This photo was taken at 400 iso and this one was the closet to the natural colour of what it was outside.
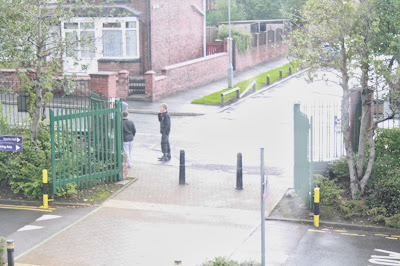
This photo was take 1600 iso and the picture looks very bright and over exposed.
The iso setting depends on the weather and if it is very overcast you would use a high iso and if it was bright outside you would use a low iso.
Activity 6 was to use the shutter speed and use all the different settings available on the camera.
The shutter speed is used for how long you want to take a picture for. So if you use the lowest shutter speed which is 1/4 the picture will be really bright because the shutter is open for longer. The highest shutter speed is 1/4,000 the picture will be really dark because it isn't letting much light in because the shutter closes quicker.
1/4
1/5
1/10
1/20
1/40
1/50
1/60
1/80
1/100
1/125
1/160
1/200
1/250
1/320
1/400
1/500
1/640
1/800
1/1,000
1/1,600
Activity 7 was to use the aperture (F Stop) setting on the camera and you use all of them until you can no longer see the image.
Aperture is the opening a closing of the lense smaller the opening the more it is on focused on a specific part of something but if it is open more everything will be in focus, but the picture gets darker.
F Stop 4
F Stop 4.5
F Stop 5
F Stop 5.6
F Stop 6.3
F Stop 7.1
F Stop 8
F Stop 9
F Stop 10
F Stop 11
F Stop 13
F Stop 14
F Stop 16
F Stop 18
F Stop 20




No comments:
Post a Comment